The smart tool bar will auto configure itself based on the screen and action permissible. Each button has a description when you move the cursor over the button.

The top toolbar provides Quick action icon for common task.
![]()
![]() The RHOP Icon provides the following actions:
The RHOP Icon provides the following actions:
![]() Previous, Next record
Previous, Next record
![]() Refresh - RHOP is a MULTI-USER, multi-screen program in which it is possible that a displayed screen that was open prior to an update or new record entry does not show the last update/record entered by a user. The REFRESH button available on the tool bar will always retrieve the latest data and display it in the screen being refreshed. If you do not see a record that you expect to see, select the Refresh button to make certain it is displaying the latest information.
Refresh - RHOP is a MULTI-USER, multi-screen program in which it is possible that a displayed screen that was open prior to an update or new record entry does not show the last update/record entered by a user. The REFRESH button available on the tool bar will always retrieve the latest data and display it in the screen being refreshed. If you do not see a record that you expect to see, select the Refresh button to make certain it is displaying the latest information.
![]() Save button and the Save and Close button
Save button and the Save and Close button
![]() Cancel button
Cancel button
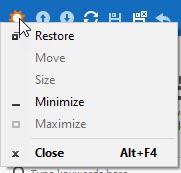
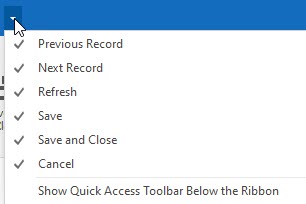
![]() The option button permits users to activate or hide the items shown.
The option button permits users to activate or hide the items shown.

IMPORTANT
1) The smart tool bar will only display the buttons relevant to the display screen that is active (you are currently viewing). As you navigate into different screens the tool bar buttons/options displayed will change.
2) Each button can displays a descriptive text of it's functions when highlighted.
|
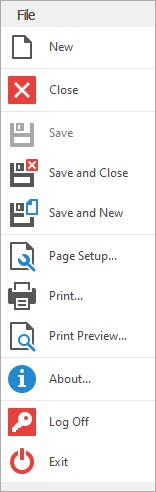
File Tool Bar
|
New Create a new Record
Close the Active/Open screen
Save the data on the active screen
Save the Data on the open/Active screen and Close the screen
Save the Data record and open a New data record ready for entry.
Page Setup for Printing a report
Print current screen
Print Preview of Current active screen/form/report
About Legal Statement for Code Signing Security
Log Off of RHOP (close the program and permit another user to logon)
Exit RHOP (Close the program)
|
Main HOME Tool Bar
To Create a record:
 Will create a new record based on the open/active screen.
To Save a record:
![]() Will save the record and stay on the active screen.
Will save the record and stay on the active screen.
 Will Save and Close the active / open screen.
 Will save the current record, close and create a new record ready to entered.
To Edit a record:
![]() Will delete the Selected or Open record
Will delete the Selected or Open record
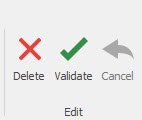 The Validate Button will appear when a user can validate the data entered against pre-defined business rules for a record they have edited but not yet saved. The Validate button will verify that the data entry will be acceptable and no missing or error is detected.
![]() Will cancel the edit of the open or selected entry. None of the changes made since the last save action will be saved.
Will cancel the edit of the open or selected entry. None of the changes made since the last save action will be saved.
Open Related record:
 Will open any related record associated with the active record. The database is made up of Master Detail relationships. If you are on a Master table this button can open a detail table related to the active record or open an edit screen for a table in the relationship of the data shown.
View Record:
 The refresh button will refresh the record(s) displayed on the active screen. It will retrieve from the database a copy of the stored data. RHOP is a MULTI-USER, multi-screen program in which it is possible that a displayed screen that was open prior to an update or new record entry does not show the last update/record entered by a user. The REFRESH button available on the tool bar will always retrieve the latest data and display it in the screen being refreshed. If you do not see a record that you expect to see, select the Refresh button to make certain it is displaying the latest information.
 If a user has modified the view of the displayed record/screen, the Reset View Settings will reset them to the system default values.
 If you are located in a section of the application where special action buttons are available they will display in this area of the tool bar. In this example the Delete rebate ASmount button is available as a special action item.
 This is the RHOP main help button that displays this User Help File.
 If a specific help section is available in the Help file for the open/active screen, you will see a second Help button that will link you directly to the section of the help file for the screen you are viewing.
 When a active screen is displayed the Live support button will appear. The Live Support button allows users to contact Accra Solution and request assistance with the application.
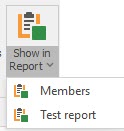 The Show in Report button is a dynamic button that allows users to create quick ad hoc reports of the data object they are viewing. In this example the button gives access to 2 reports a basic members report and a user defined Test report.
Record Navigation:
 The Record navigation buttons allows users to navigate / view different records (row) of information by scrolling through the available records.
Full Text Search:
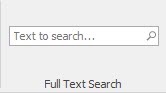 The Full Text Search option permits user to use the Full Text Search capabilities of the system to find a record. (IMPORTANT this Text search is Case Sensitive)
![]() In grids, located in the top right corner of the grid, the Full Text Search button is displayed that allows a user to search using a Full Text for a record within the grid.
In grids, located in the top right corner of the grid, the Full Text Search button is displayed that allows a user to search using a Full Text for a record within the grid.
Close
![]() This button will close the Open / Active screen.
This button will close the Open / Active screen.
View Tool Bar

The View tab on the main Tool bar gives access to navigation options, Appearance and Open Windows List for the RHOP application.
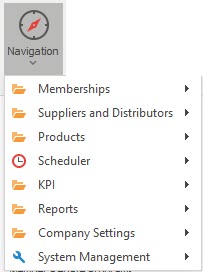 The Navigation button allows the user to navigate in the RHOP application.
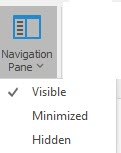 Users can modify the display of the Navigation Pane located to the left of the RHOP screen.
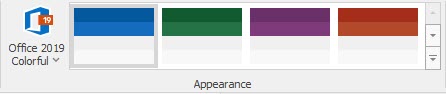 The appearance option permits users to define the color scheme of the RHOP application. Each user can customize the color appearance for their copy of the RHOP application. The user can select one of the 4 color schemes displayed to the right of the Appearance section or choose one of the available Themes available under the First button displayed (in this example the Office 2019 Colorful Theme).
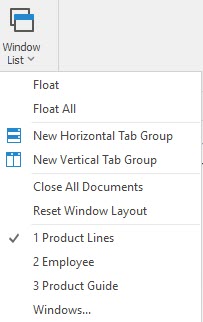
The Windows List button displays all active Windows and permit users to easily navigate to the selected Window. The User can also Float Windows, close documents, close all tab but this or adjust the tabs display for the application Close all Open Windows or reset the Windows Layout to the default settings.
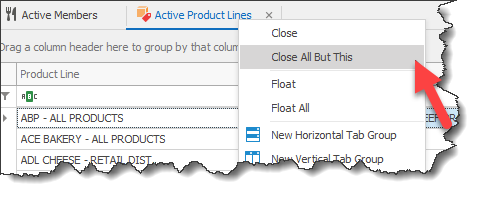
How To Close Open Documents or Tabs
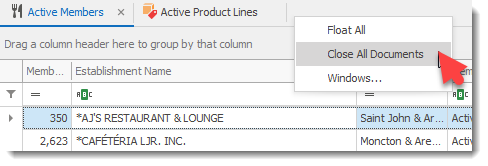
The screen permits multiple ways to close an open documents or tabs by selecting various options in the pop up menu (right click your mouse over the tab section of the screen).
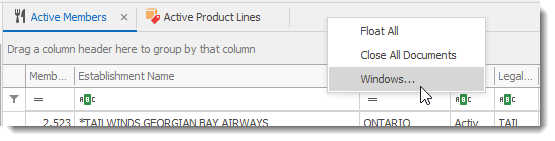
The Windows Option displays all open windows dialog allowing users to close any selected Windows.

A user can also navigate to a open Window by selecting to the right of the screen the arrow displaying the open windows list.

Font Size
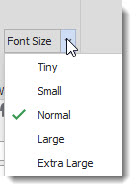
The Font Size option drop down field allows users to modify the screen Font size for the RHOP application. By default it is set to the Windows Normal font size. If you require a larger or smaller size you can select the appropriate font size using the dropdown option.
Tool Bar
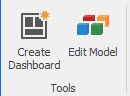
The Create Dashboard button allows advance users to create their own Dashboard via the Dashboard Wizard.
The Edit Model option should be assigned restrictive access and is designed for system administrators/programmers that need to make changes to the RHOP program model. Only Advance users should have access to this section which requires advance programming knowledge as not to corrupt your application. Changes to the model may negate the warranty for your application.