Users can create as many Role(s) as required. Roles can be configured to provide as much or as limited access as required. Roles can be assigned to more than one user. By default an Administrator Role is created. You can create a role for each employee or for a group of employees doing a defined task. Each role can have its unique access rights. For example you could create a Staff role or Salesperson role giving defined and unique access to users assigned one of these roles. You could also create another role called Management which may contain more access privileges than the staff role.
IMPORTANT
Use the "Link" and "Unlink"
Roles and access rights are cumulative base or granting access permission. Hence if you assign a basic role that denies access to an item.and then add a second role that grants access to the item, The user will be granted access rights to the item. Any access rights will override the deny action. If you want to deny an action you must consistently deny the action in all Roles to block the user from having access to the action.
|
Create a new Role
▪To Create a new Role select the New  button on the tool bar.
▪Enter the Name for the New Role
▪If the Role is to have Administrator privileges select the Is Administrator check box. ( Administrator privileges should be restricted as it it very dangerous and powerful)
▪Can Edit Model : Access to this option should be extremely limited and only available to advanced and trusted users since it has the capability of changing the internal workings of the application.
Permission Policy
The Allow/Deny Permission Policy determines Security System's behavior when there are no explicitly specified permissions for a specific type, object or member (part/section of the application). By default the permission policy for a new user is set to Deny.
The application's administrators can allow access to all data within the application for a specific role and simultaneously deny access to certain data types or members (part/section of the application). They can also deny access to all data for a role and only allow access to a specific list of objects (data) or members (part/section of the application).
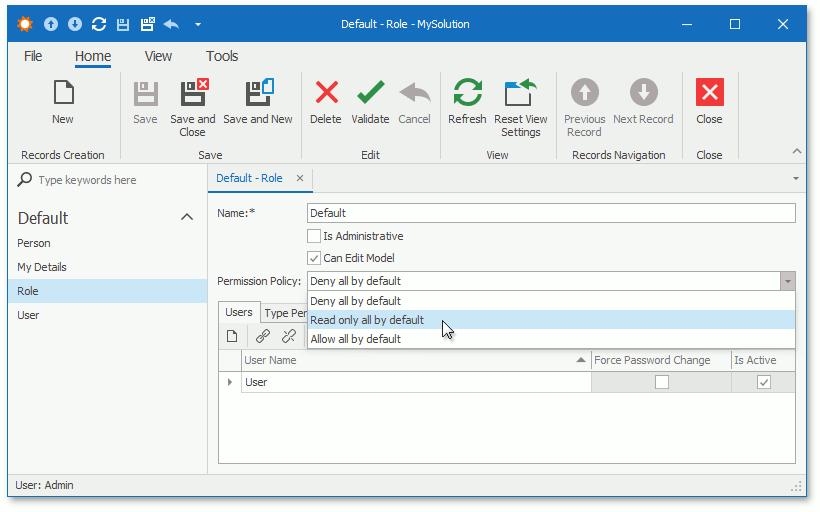
You can use this property to assign "deny all", "read-only all" or "allow all" default Permission Policies to each role, and explicitly specify the Allow or Deny modifier or leave it blank for each operation.
The Security System checks whether an access to an object's property is allowed on several levels. The following image shows the levels in priority order:
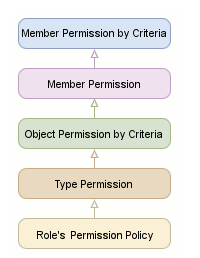
"Member Permission by Criteria" has the highest priority and the Security System processes it first. The Security System uses explicit permissions at this level to determine whether access is allowed. If the role has not any explicit permissions on this level, the Security System processes permissions at the next level according to the scheme above.
The "Role's Permission Policy" has the lowest priority and is used only when type, object, and member permissions are not explicitly specified.
User Tab
The user tab displays all users using the defined Role. You can give access or remove access to the role by editing and placing a check mark in Is active check box in the grid. You can also force a password change by
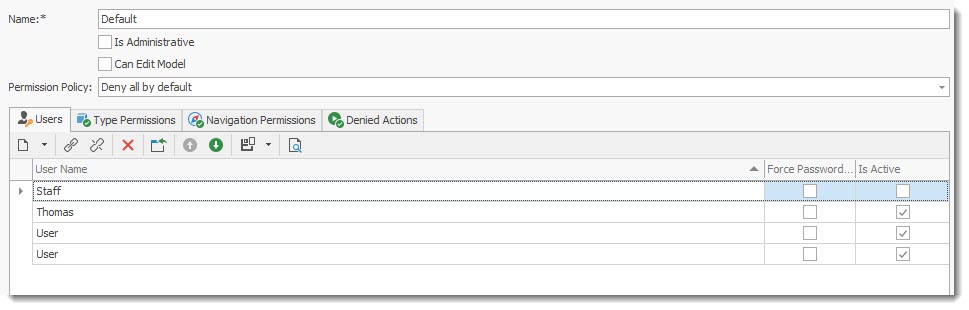
You can give access or remove access to the role to a specific user by editing and placing a check mark in Is active check box for the user.
•To Create a new User select the New ![]() button on the tool bar.
button on the tool bar.
•To Edit select the user and click on the record to open the user record.
•To Force a Password change for the user, place a check mark on Force Password Change
•To activate the user role place a check mark in the Is Active checkbox. Remove the check mark to de-activate the role.

Navigation Permissions
You can manage access to navigation control's items in the Navigation Permissions tab. You can grant or deny a permission for a single navigation item or for the whole navigation group as shown on the image below:
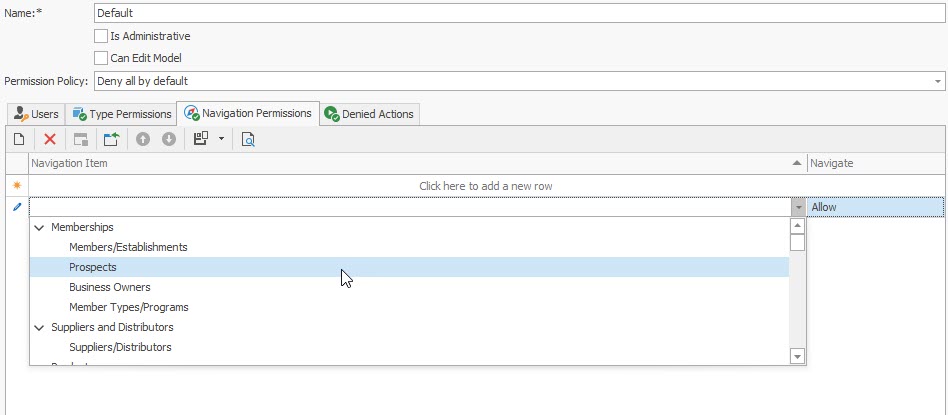
Set the Allow or Deny value to permit or deny access.
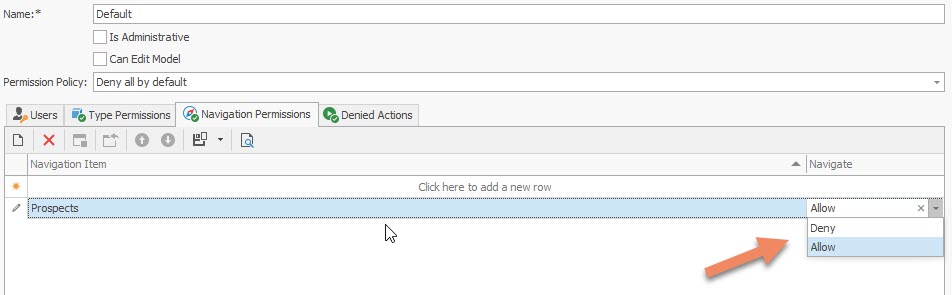
Item permissions have a greater priority than group permissions. For instance, if you deny access to the group, but grant access for one of its items, this item is enabled in the navigation control.
IMPORTANTNavigation permissions manage the visibility of the navigation control's items. They do not grant or deny access to navigation items' associated business objects. Use Type permissions or Object permissions to manage access to these objects.
|
Type Permissions
The Type Permissions tab specifies access to all objects of a particular type.
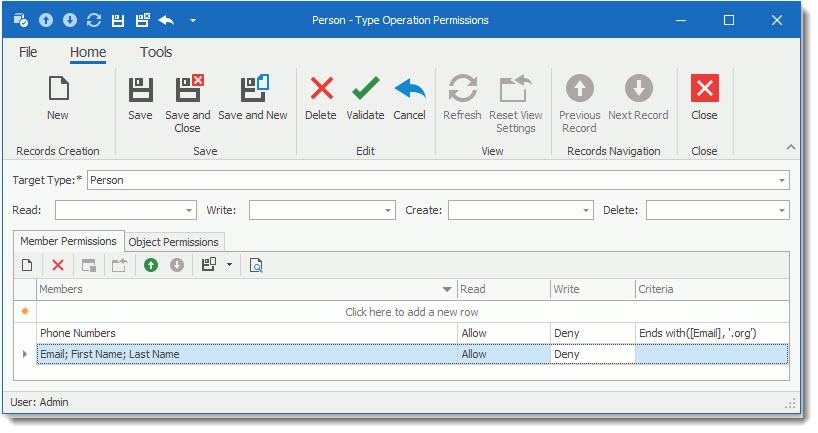
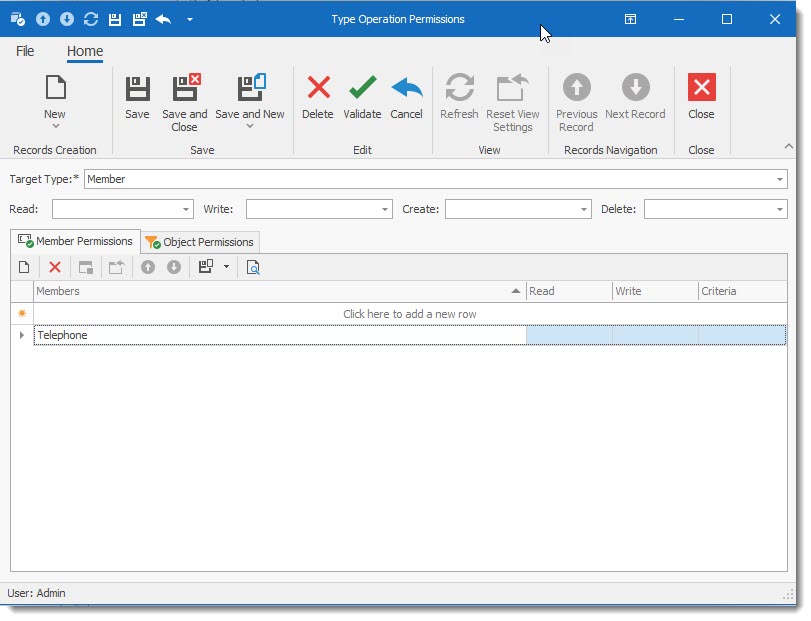
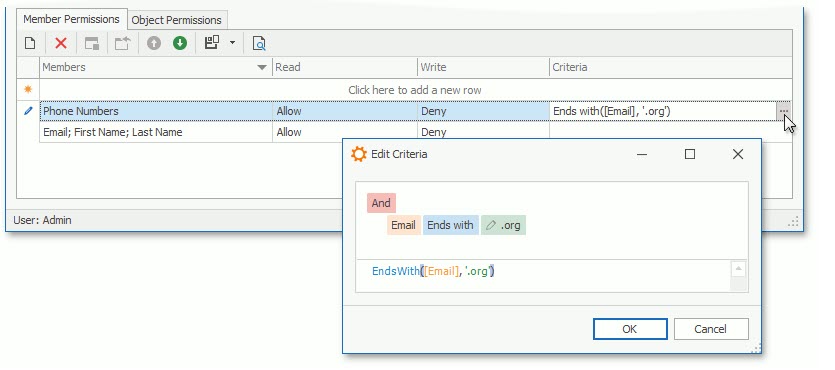
Member Permissions
Member permissions grant access to specific members (parts/section of the application). Double-click a record in a type permission list to invoke the following dialog.
•To Create a New Type Permission select the New ![]() button on the tool bar.
button on the tool bar.
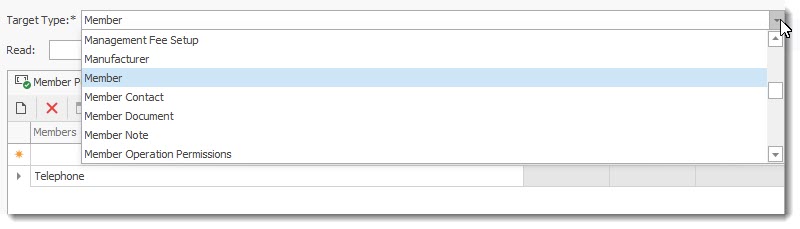
•Select the Target Type from the drop down List. The drop down list gives access to all objects of your application.
•Select the item you wish to control from the drop down list in the Member Permission Tab. Place a check mark to select the member field.

•Click on the selected field to open the Type Permission screen. Select the Read and Write action you wish to provide. The criteria field allows for advanced conditions to be defined as to when the permission rule is to be applied.

You can also specify a criterion for a Member permission entry. The entry is active when the current object meets the criterion.
Save your settings to register the change.
The following operation types can be granted or denied:
Operation |
Description |
Read |
Objects of the current type are readable. To make an object read-only, allow the Read operation and deny the Write operation. |
Write |
Objects of the current type are editable. |
Create |
New objects of the current type can be created. Note that granting Create without Write does not allow a user to save new objects. |
Delete |
Objects of the current type can be deleted. |
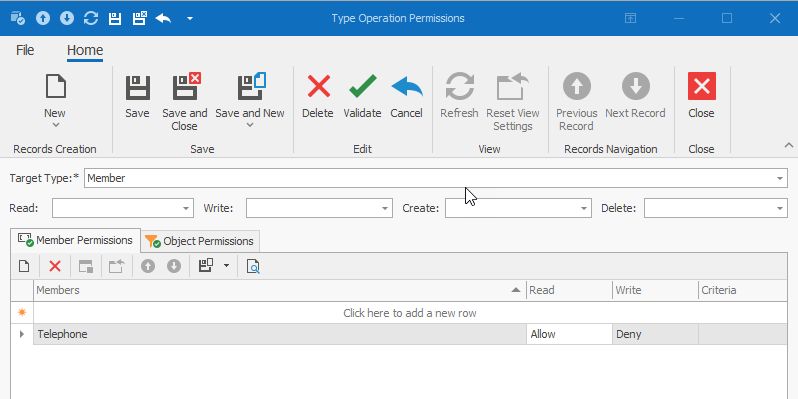
Object Permissions
Object permissions is an advance permission option that grant access to object instances that fit a specified criterion. The following image illustrates the Object Permissions tab in the Type Operation Permissions dialog.

Action Permissions
This is an Advance option that should be discussed with the software developer before being used. The Security System allows you to prohibit execution of both custom and system Actions. Click the Denied Actions tab and specify Actions to be hidden from the UI. The image below illustrates the Role Detail View that shows this tab.
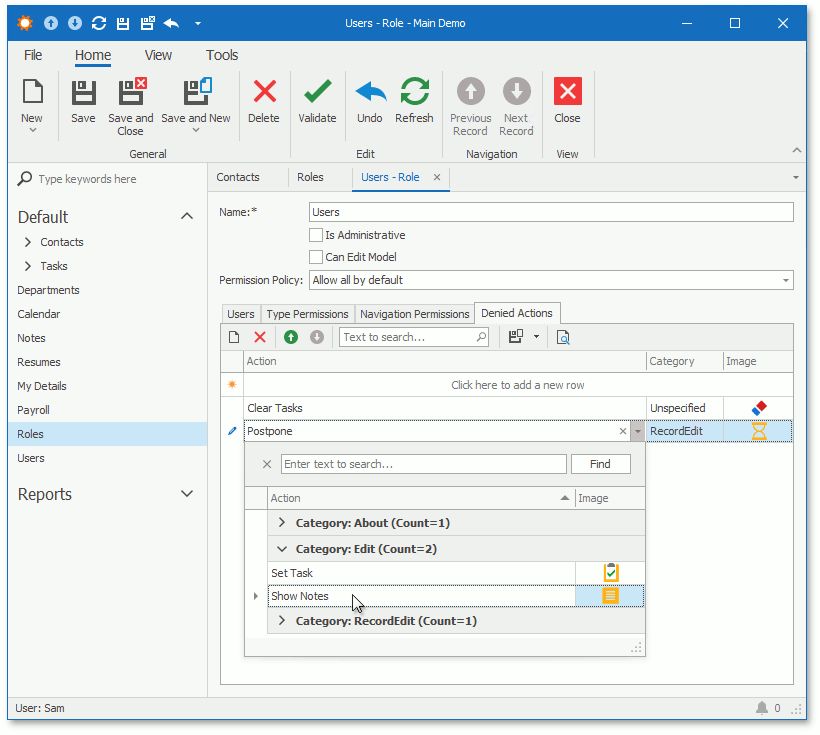
The Security System marks built-in Actions as non-secure and hides them in the Denied Actions tab. The NonSecureActionsInitializing event allows you to customize a list of non-secure Actions. Add custom or remove system Actions from the NonSecureActions collection to manage whether they are available in the Denied Actions tab.