The Member Purchases Area contains all purchases made by the members. This screen provides for drill-down capabilities into the data (see below for more information).
IMPORTANT
Required fields are identified with a * beside the field.
The data Views available are displayed in the menu and tool bar. However to properly display the variant view it is best to select the View/Variant drop down field using the option in the tool bar and not in the menu. ( By default this dropdown field overrides the menu display selection.) If you are not seeing what you think you should see, make certain that this dropdown field is properly selected to the view required.
Note: To display All Purchases records contained in the database will take up to a minute to display on your screen ( based on the approximately 10 million records that was initially loaded into the system). By default the system will only display the purchases for the last 12 months.
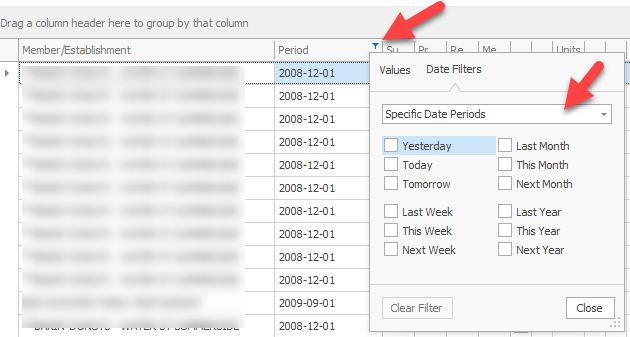
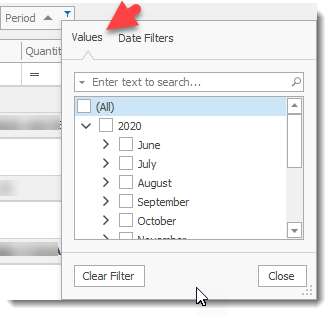
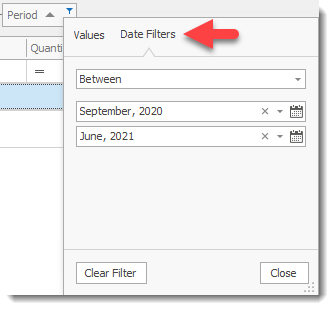
You can filter the data being displayed on the screen by selecting the Period column of the grid and choosing the data you wish to view.
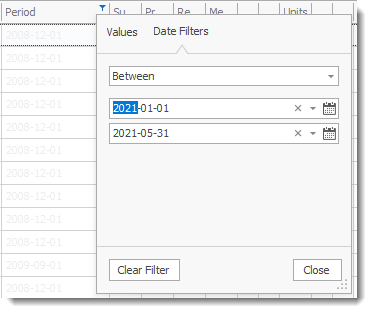
Example of choosing the Between option
|

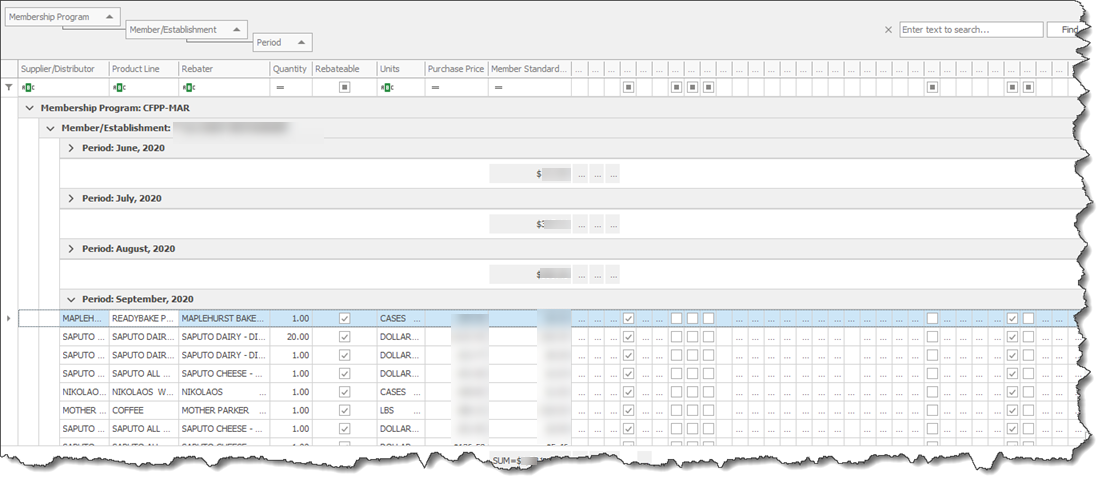
The Purchase screen layout makes use of the Grouping and View Variants feature providing the user with a screen permitting easy drill-down capabilities.
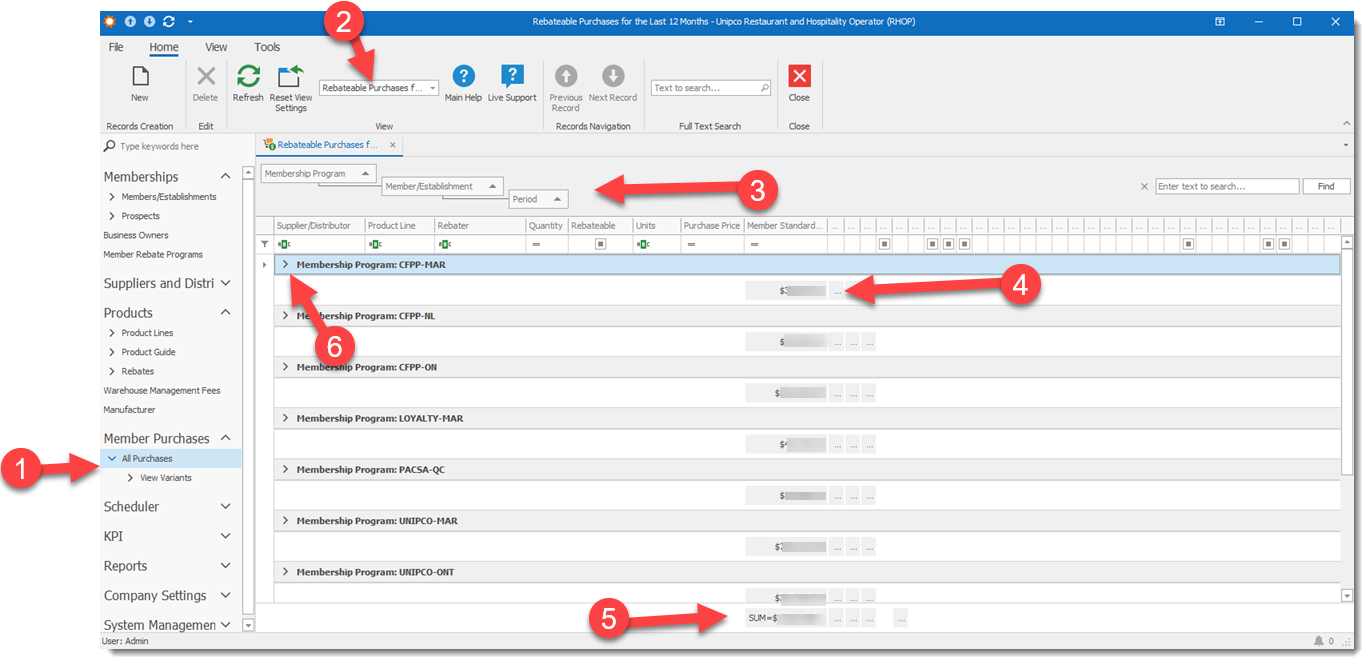
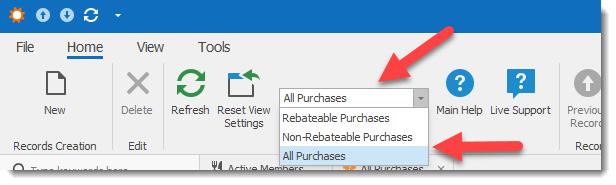
To view the purchases select the All purchases option in the menu (1) by default it will display all Rebateable Purchases for the last 12 months as selected by the Dropdown selection field (2).
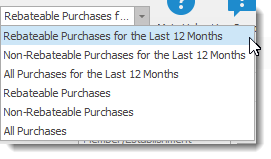
The displayed data can be changed by selecting from the dropdown the View Variants required. ( Note that loading All Purchases will take several minutes due to the volume of data being assembled and transferred to your PC screen. It is best to filter the data beforehand to reduce the amount of data being processed ( see below).
When the screen is displayed it will first provide a summary of the Rebateable Purchases for the last 12 months amounts for each program (4) listed with a total for all programs (5).
The User can then drill down into the program of interest to view the detail data by selecting the > (6) icon to expand the data viewed. ( Note that as you drill-down into the data the screen will be loaded with the selected data, this process can take a few second depending on the volume of data being requested.
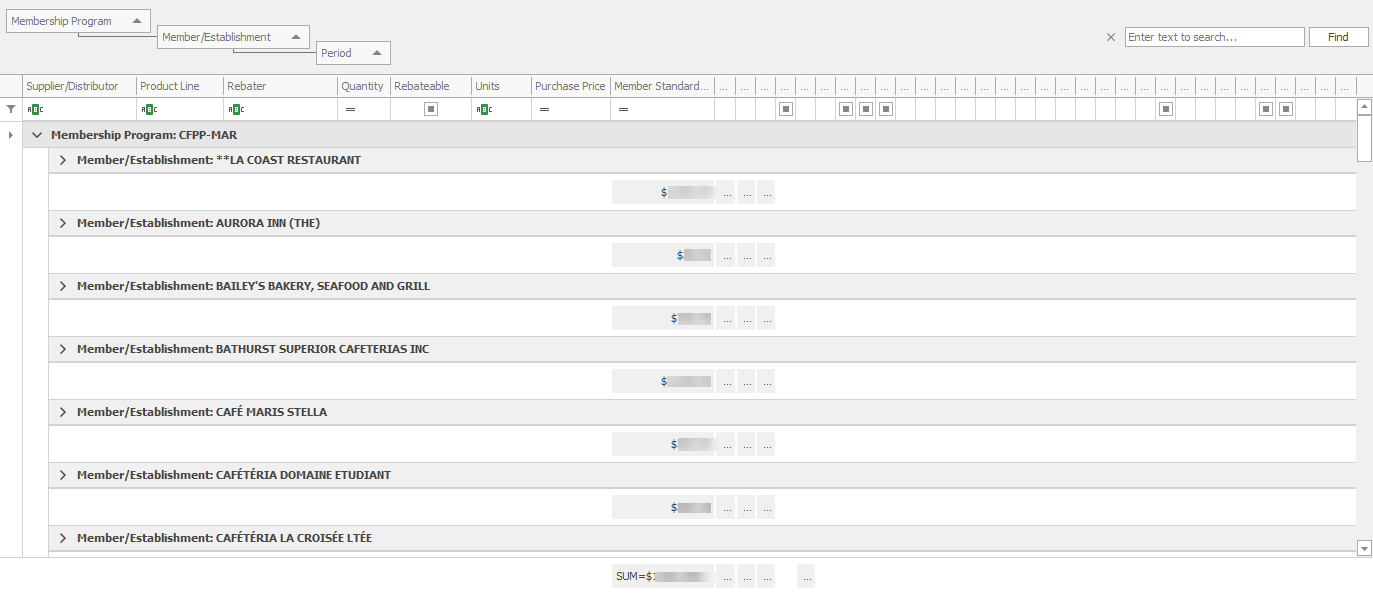
Each establishment can also be expanded to display the purchases for each period..
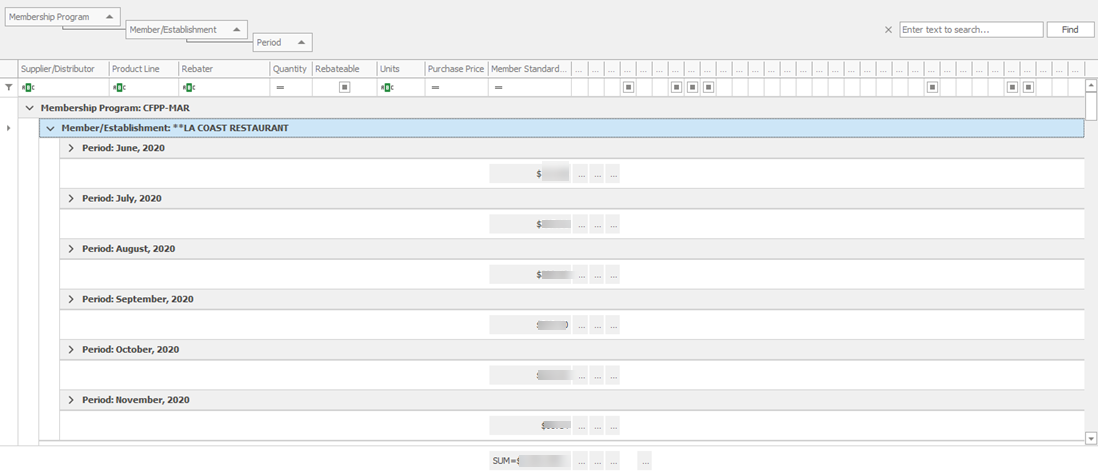
Each Period can be expanded to view the purchase details, Note that it takes a few second to display all purchases based on the volume of data to be shown.
Filter Data
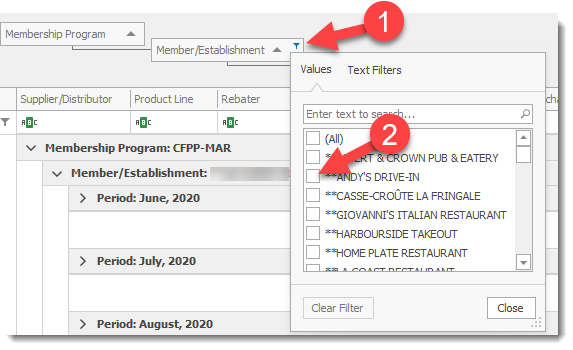
To speed up the display process or selecting a specific record the user can filter the data.
By selecting the Filter (1) icon in the column header a user can easily select from the drop down display the data to be shown by placing a check mark beside the item to be shown ( users can select one or more items at a time and apply one or more filters from different column headers). Once the selection criteria is selected the screen will automatically refresh to show the selection criteria specified. On the bottom of the gird the selection / filter criteria will be displayed. Custom periods can also be selected by selecting a data range.


Advanced Filtering
To customize or refine a filter a user can select the Filter Editor that provides Advanced Filtering options.
Select the column header you wish to filter on and right click your mouse to display the option menu. Select Filter Editor...
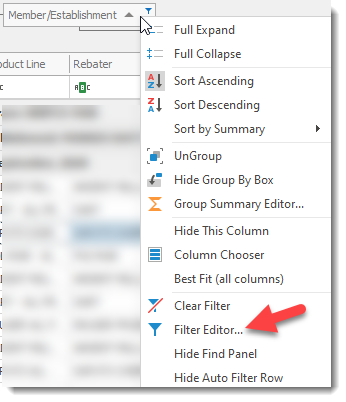
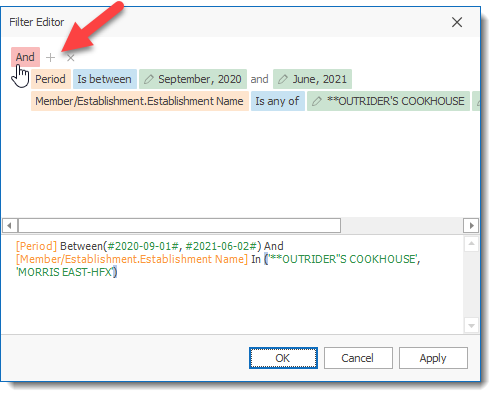
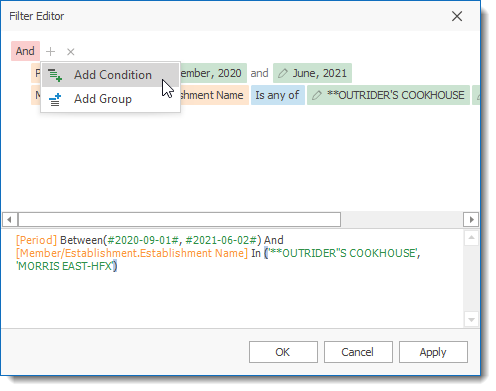
The Filter Editor screen will be displayed. You can add or remove filters by selecting the + or X sign. When selecting the + sign you can select to add a condition ( filter) or a Grouping for the data to be displayed. For advanced users, the bottom of the screen displays the actual SQL language code that will be used to retrieve, filter, sort and group the requested data. A user can directly enter the SQL commands in this section to create their own advanced filtering commands. For more information see the help on the Filter Editor and see the Filter Grid Data section of the Help file.
Important
The selection criteria will remain in effect until it is changed or removed by the user even if you change the view variant from one view variant to another. To remove the filter remove the check mark ( temporarily removes the filter) or select the X to permanently remove the filter. The drop down arrow at the end of the filter permits the user to modify the filter. The temporary removal option allows you to store for future use a common filter you will reuse.
|
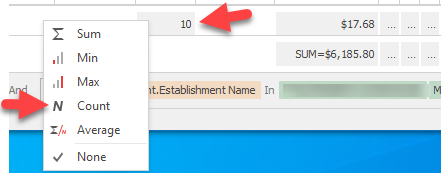
The Summary Row Totals in the grid can be user modified by right clicking the summary row and selecting one of the other summary options to add to the row. In the example below we selected the count option which displays the number of items being displayed in the grid. (View Show Summary ( Totals) in Grids for more information).