IMPORTANT
To upload a purchase file, it must be in the file format defined for use by the UNIPCO system. If the file format changes or does not match the file definition format defined it cannot be uploaded by the system. Some file formats can be manually altered / corrected to meet the required file format. Required fields are identified with a * beside the field.
|
The Load Purchases section permits users to load the various purchase files provided each month into the Unipco system.
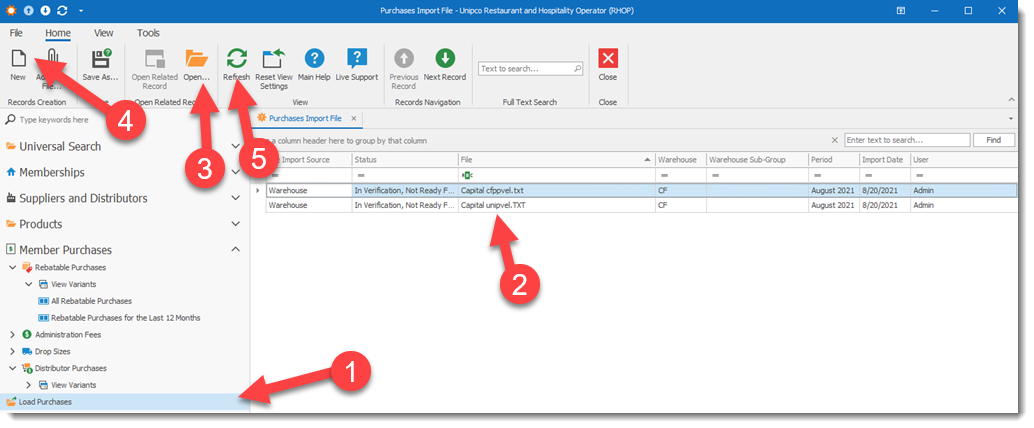
1) Access the Load Purchases screen
2) List all files loaded into the Unipco system. The period column display the files associated with a specific period. The Import Date displays the date when the data was uploaded into the system. The User column identifies the user that uploaded the data into the system. The Status column identifies the Status of the Import file (Import Completed or In Verification, Not Loaded, Loaded not Processed, etc mode). Selecting the file will open the file in a display window
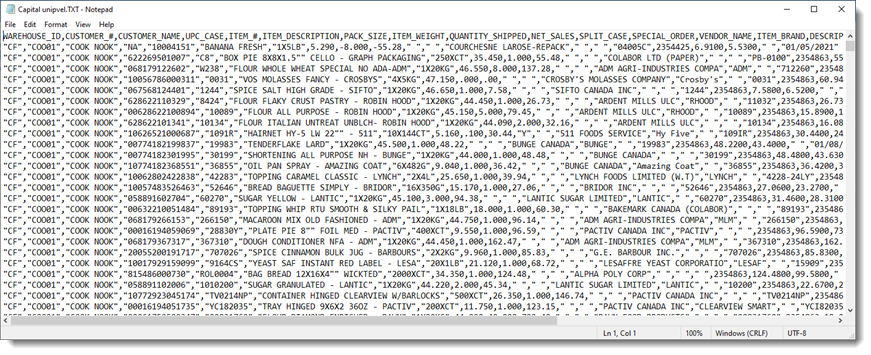
3) To open and view an existing file listed in the grid. Select the file and select the Open button. ( you must have an application installed on your PC that can open the file format of the file selected).
4) To upload a NEW file select the New button on the Upload Screen. The Upload screen will be displayed.
5) The Refresh button permits a user to refresh the list view or grid view and Detail View displayed when a new or change record was entered but is not being displayed. The refresh will retrieve the data and update the display.
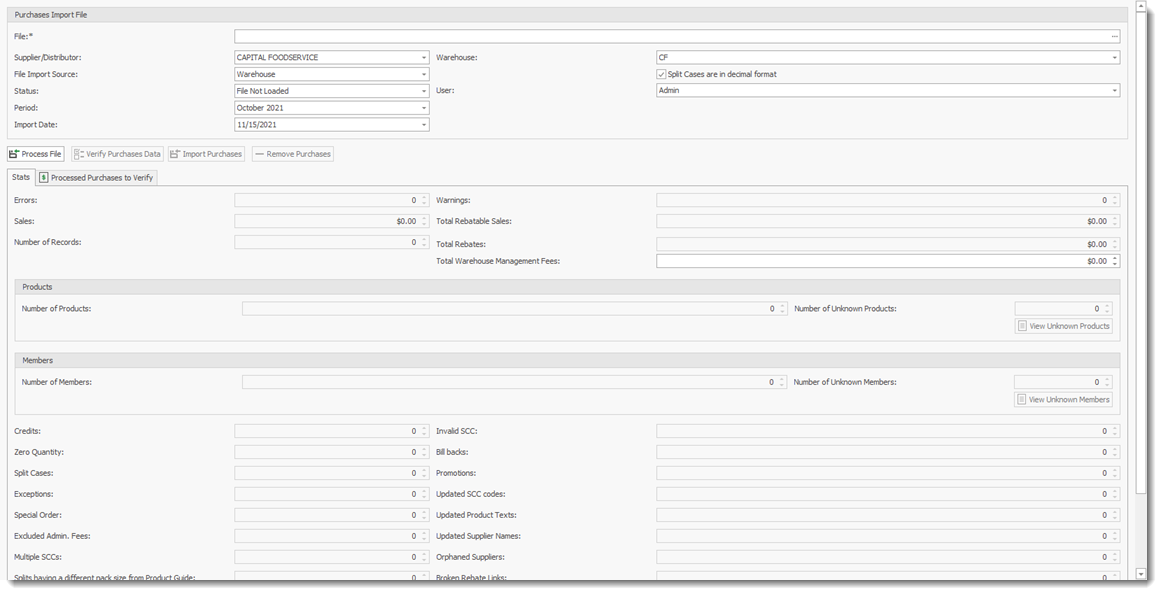
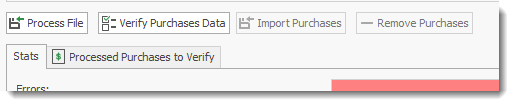
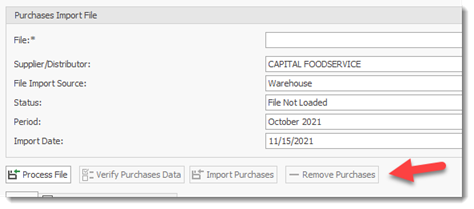
The file import process is a 3-step process;
1)the Process File button loads and analyzes the file for potential issues
2)Once you have corrected all issues (see below), select the Verify Purchase Data button to makes certain that all data is corrected and ready for import. If errors are still found, it will stay at that step until every issue is fixed. The Verify Purchase Data button can be selected multiple times as corrections are made. Each time it is selected it will re-evaluate the file and and identify any remaining issues. Once every issue is fixed the Import Purchase button will become active (not greyed out).
3)Import Purchases button completes the import process and post/saves all records to the database.
4)The fourth step (Optional) is to Remove Purchases from the system, if you need to back out an import file. This button is grayed out and is not available until a file has completed the import process (step 1-3).
The File field permits the user to find and select the file to upload. The file must be loaded on the PC or accessible in a shared folder from the PC uploading the file.
Supplier /Distributor: Allows the user to select the Supplier /Distributor for the file data to be uploaded.
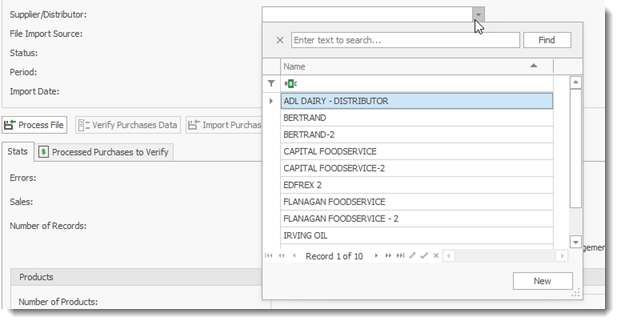
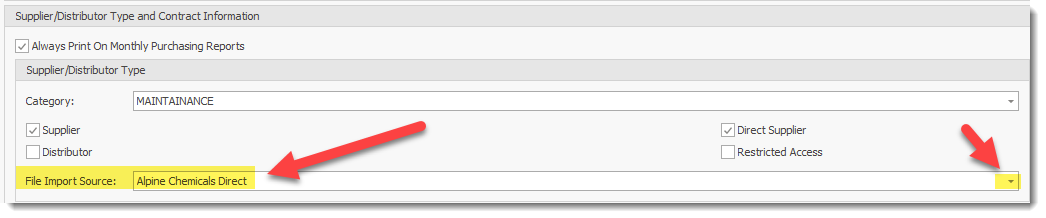
Direct Supplier File Import Source: To be able to import Direct Suppliers transaction files, the user must specify for the Direct Supplier the File Import Source. The File Import source field only appears if the supplier profile is a direct supplier.
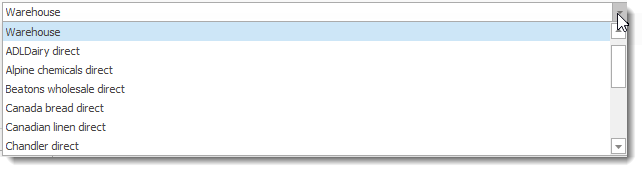
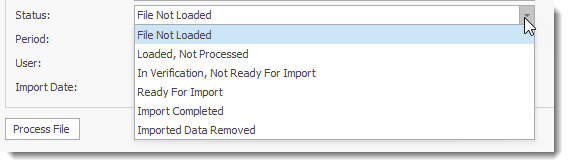
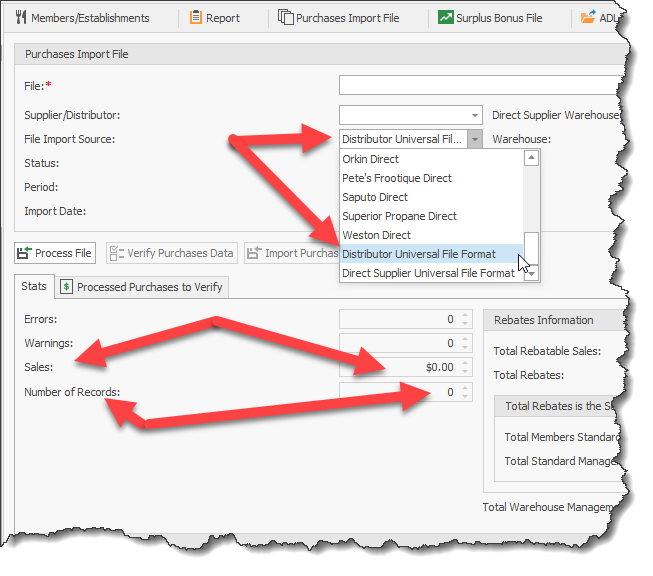
File Import Source: identifies the File format type for the file to be processed. In the above example we selected Warehouse . The Warehouse field identifies the file format to use for processing the file. In the example, we are using "Warehouse" for the selected file type. The image of the drop down field below, displays some of the other file format options available.
Status: identified the current upload status of the file.
Period: The accounting period for the selected file
User: the User that uploaded the file
Import Date: the date when the import of the file was done
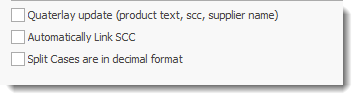
Available Options for importing the file: User must identify the applicable options for the file import.
Process File button: will start the upload process for the selected file.
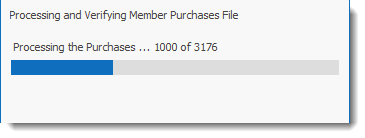
Please note that due to the many steps, formatting and verification processes associated with a file, the file import will take several ( 5 -12+) minutes to complete. The file processing is done on the local PC processing the file. For maximum performance a fast CPU and fast network connection will speed up the processing time required. A slow PC will take more time to process the file. A progress message is displayed on the PC screen indicating the progress of the file process. Once the file is totally processed a pop up message is displayed to the user indicating that the process is completed.
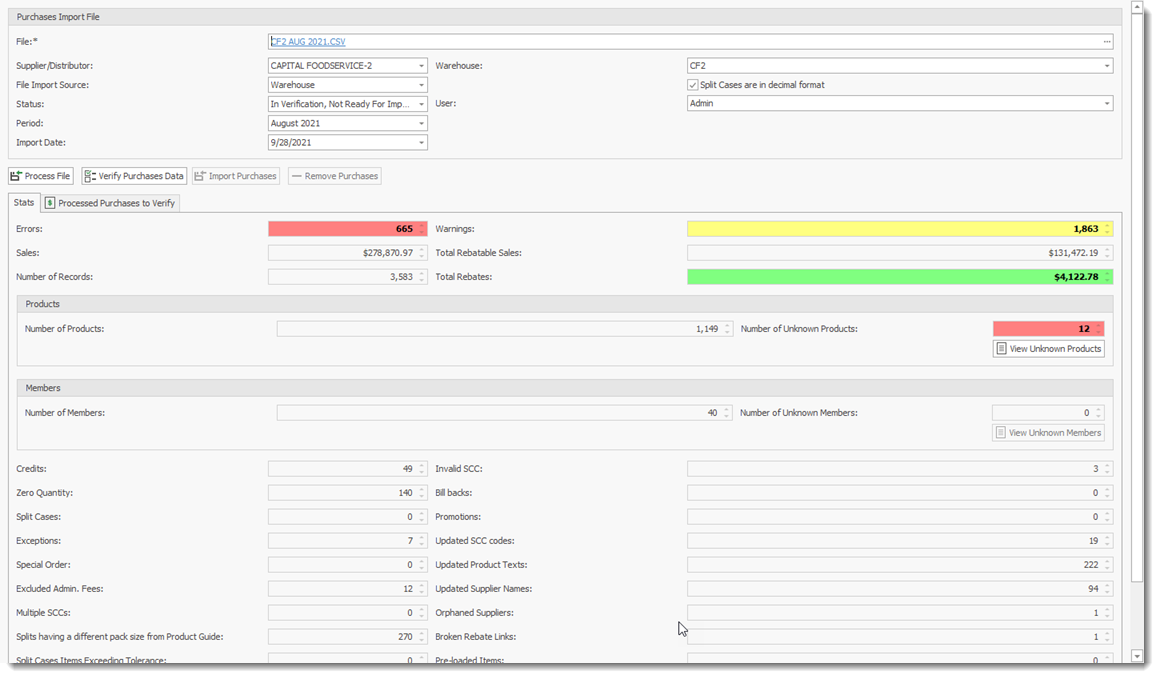
Stat tab: The Stat tab displays various statistics on the file uploaded and processed. It also contains various buttons to view the related information for the statistic shown such as Unknown Products and Unknown Member.
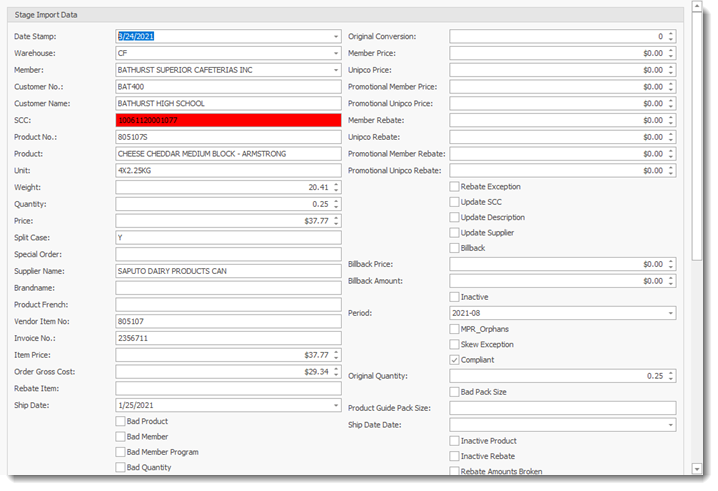
Important If validation errors or warnings are detected when processing the upload file, the data in the upload file will not be uploaded to the database but stored into the Stage Import Data grid ( see below) for the user to correct any identified discrepancies. Only once all warnings and errors have been corrected will the data be uploaded to the database.
|

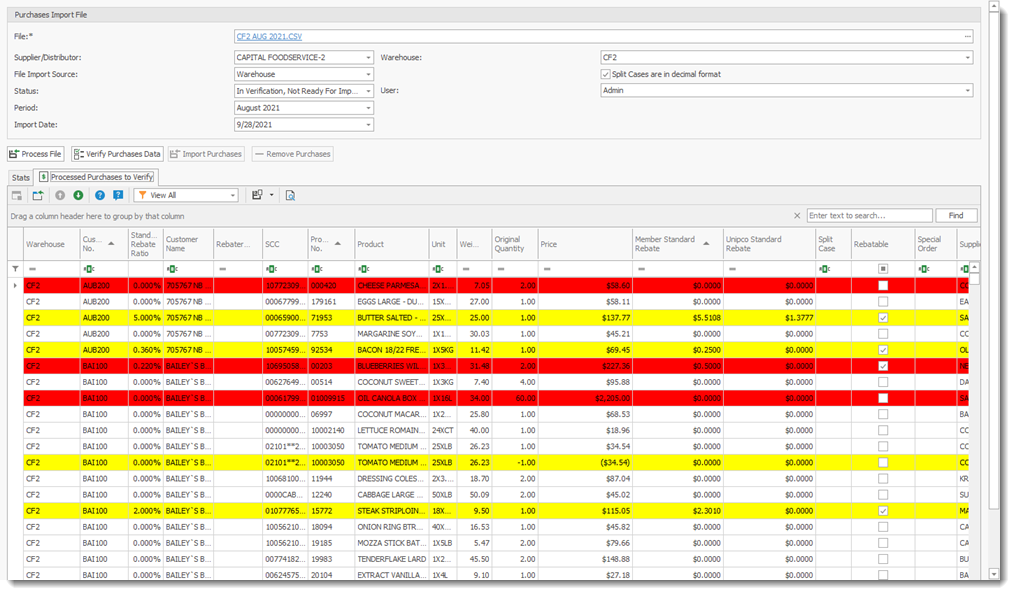
The Stats tab displays the content of the file to be imported. Once the file has been processed, the grid is color coded to indicate the records having issues. A user can re-process a file as many times as required to clear all errors and warnings. All items must be corrected before the file upload can be completed. A user can select and open a record in the grid which displays the record information.
When selecting the Distributor Universal File Format option RHOP will automatically identify if the file is in a CSV or JSON format.
The content of the JSON file can be verified for any abnormalities by comparing in the JSON file, the Sales Total and the total records it contains (the first 2 lines of the JSON file). These values are automatically calculated by the suppliers computer when creating the JSON file and once imported, the the values are again independently calculated by RHOP.
Note that it is highly unlikely, if the file format was first validated before being use, that the supplier computer made an error when doing the sum of these values. If any discrepancies exist, it is most likely due to the JSON file structure having been programmatically modified. Once the JSON file is validated there is no reason to program a different file structure.
The Processed Purchases to Verify tab displays each items to be imported and color codes the items to be verified.
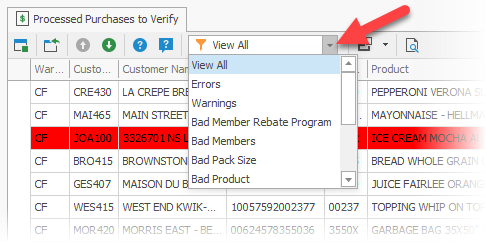
How to Clear Errors In Processed Data
Users can define what is displayed (Error Types) in the grid by selecting the Filter field. The Filter list is extensive and can provide a quick access to correct records.
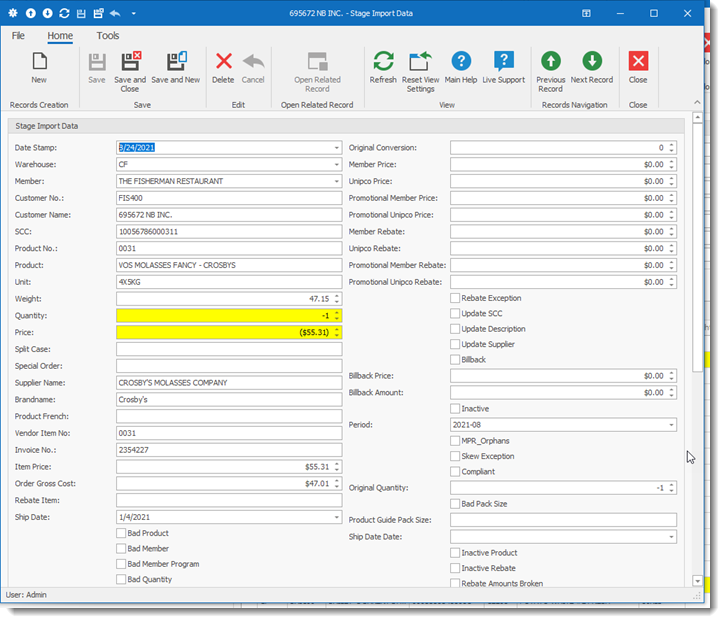
Double click on a row ( as shown above in Red) to open the record in error. The error/warning will be identified in color as shown below.
Color codes:
White: record has passed all verification checks and is ready to be uploaded to the database
Yellow: Warning message on the record (i.e. product does not exist, no scc, missing info, etc.) The record must be corrected before it can be uploaded.
Red: Record has incorrect data. The record must be corrected before it can be uploaded (i.e. scc format incorrect, incorrect quantities, incorrect price, etc.)
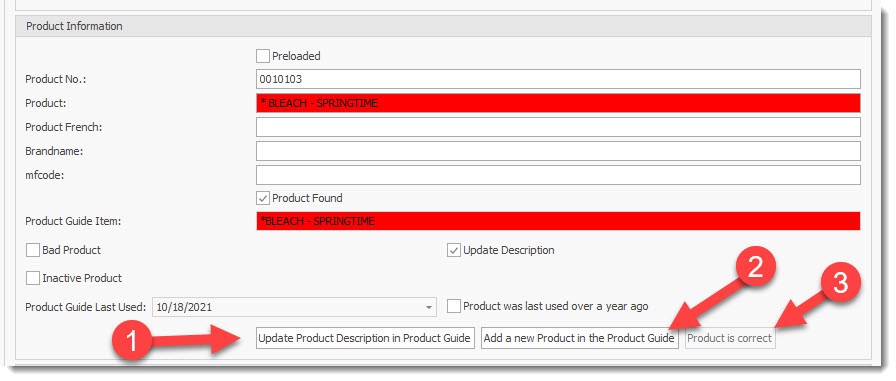
To correct an error Update buttons (1, 2) are available to record your action. The Update Product Description in Product Guide (1) button (adds the new name as an alias for the product) or the Add a New Product in the Product Guide (2) (create a new product). The Product is Correct (3) button accepts the product as entered.

Users can also create or load SCC codes for a product.
1.Get the SCC From the Product Guide
2.Upload the Product Guide SCC
3.Create SCC with manufacturer Code and Product No.

Users can enter the product Pack size by using the Update Unit/Pack Size in the Product Guide.
Other buttons are also available for various sections such as Supplier.
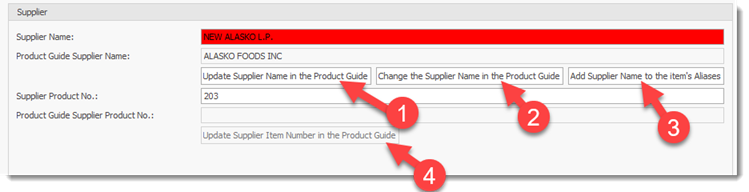
4.Update Supplier Name in the product Guide: "Update Supplier Name in the Product Guide": Will update the supplier name in the product and will add the previous supplier name (in the product guide) to a list of aliases associated with that product guide item. Use this option if it looks to be the same supplier, but a correction in the name.
5.Change the Supplier Name in the Product Guide: "Change the Supplier Name in the Product Guide": Will replace the current supplier name in the product guide and clear all the supplier name aliases associated with that product guide item. Use this option if it looks to be a different supplier than the one in the product guide.
6.Add Supplier Name to the Aliases ( the Aliases function stores the various names/text used by the supplier for a given product. When one of the Names/Aliases is matched, the product is automatically identified which reduce the number of errors one can encounter for a given product. By adding an Alias for a Product will over the medium-longer term reduce the workload related to verifying / identifying products. Note that if a product is never named the same, this function will have limited value).
7.Update Supplier Item Number in the Product Guide
Once all errors/warnings are cleared a user can re-verify (re-process) the data file before being permitted to do the final import. All errors must be cleared before you are permitted to upload the corrected and final version of an import file into the database.
Verify Purchase Data button: permits a user to re-process a loaded file and the corrections made to the loaded file. You can Verify Purchase Data as many times as required.
Import Purchases button : permits a user to do the FINAL import of the file into the database once all errors have been corrected.
IMPORTANT
YOU WILL NOT BE PERMITTED TO IMPORT A PURCHASES FILE THAT CONTAINS ERRORS. ALL REPORTED ERRORS MUST BE CLEARED BEFORE A FILE CAN BE UPLOADED FOR USE IN THE DATABASE.
|
Remove Purchases Button: permits a user to remove an uploaded file from the database.
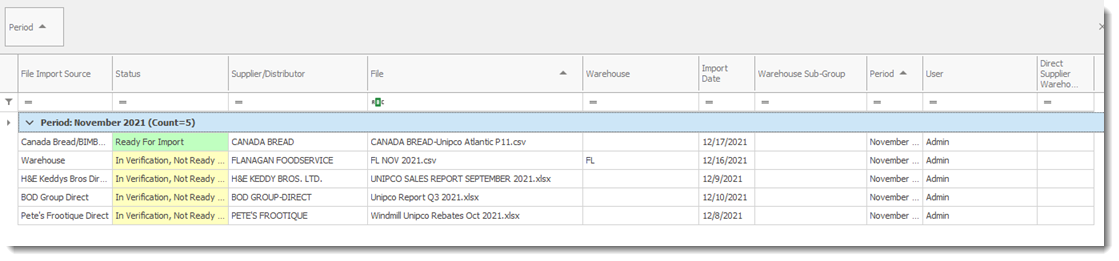
File Import Upload Status
Users can view the Status of the various import files they are uploading into RHOP. The Status column identifies the current status of an import file. Users can also use the sorting capabilities of the grid to rearrange or display specific file status.

The Items in green are ready to be imported.